Webで”WebRTC samples”を見つけました。サンプルと共に”WebRTC”について説明しているHPです。興味が有ったので幾つかのサンプルを読んでみました。
(1)Basic getUserMedia demo
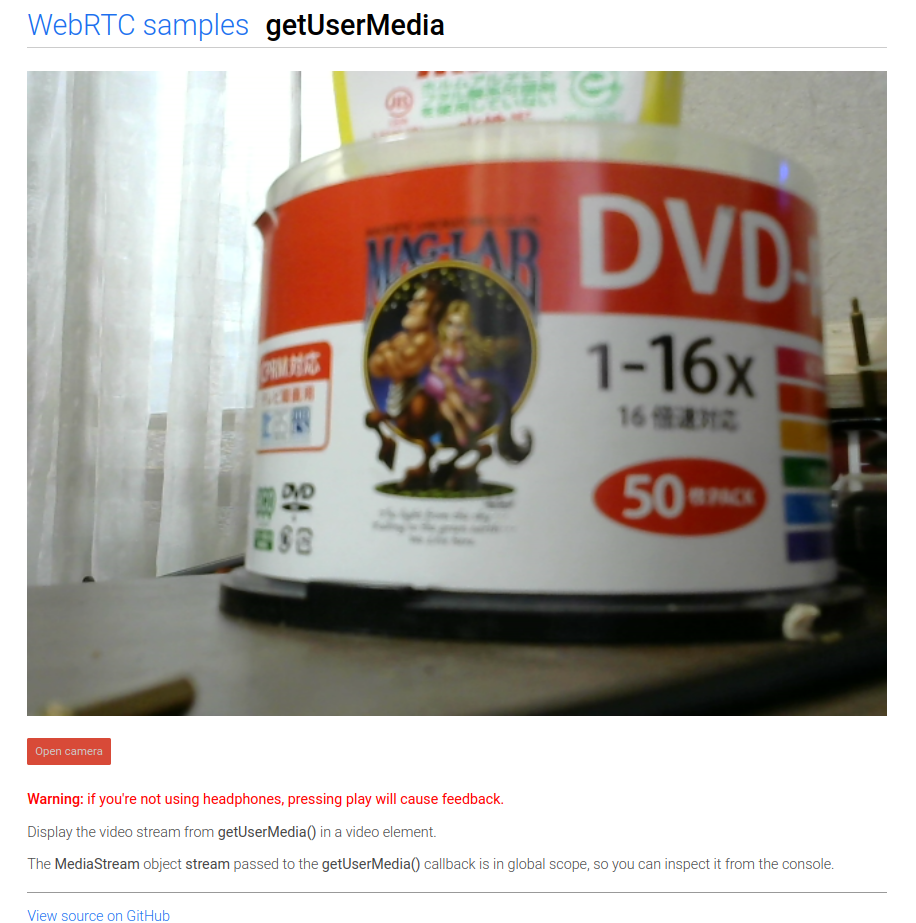
画面左下に有るOpen cameraボタン(赤いやつ)を押すと画面にカメラのライブ動画が表示されます。
このHPのソースは、
<!DOCTYPE html>
<!--
 *  Copyright (c) 2015 The WebRTC project authors. All Rights Reserved.
 *
 *  Use of this source code is governed by a BSD-style license
 *  that can be found in the LICENSE file in the root of the source
 *  tree.
-->
<html>
<head>

    <meta charset="utf-8">
    <meta name="description" content="WebRTC code samples">
    <meta name="viewport" content="width=device-width, user-scalable=yes, initial-scale=1, maximum-scale=1">
    <meta itemprop="description" content="Client-side WebRTC code samples">
    <meta itemprop="image" content="../../../images/webrtc-icon-192x192.png">
    <meta itemprop="name" content="WebRTC code samples">
    <meta name="mobile-web-app-capable" content="yes">
    <meta id="theme-color" name="theme-color" content="#ffffff">

    <base target="_blank">

    <title>getUserMedia</title>

    <link rel="icon" sizes="192x192" href="../../../images/webrtc-icon-192x192.png">
    <link href="//fonts.googleapis.com/css?family=Roboto:300,400,500,700" rel="stylesheet" type="text/css">
    <link rel="stylesheet" href="../../../css/main.css">

</head>

<body>

<div id="container">
    <h1><a href="//webrtc.github.io/samples/" title="WebRTC samples homepage">WebRTC samples</a>
        <span>getUserMedia</span></h1>

    <video id="gum-local" autoplay playsinline></video>
    <button id="showVideo">Open camera</button>

    <div id="errorMsg"></div>

    <p class="warning"><strong>Warning:</strong> if you're not using headphones, pressing play will cause feedback.</p>

    <p>Display the video stream from <code>getUserMedia()</code> in a video element.</p>

    <p>The <code>MediaStream</code> object <code>stream</code> passed to the <code>getUserMedia()</code> callback is in
        global scope, so you can inspect it from the console.</p>

    <a href="https://github.com/webrtc/samples/tree/gh-pages/src/content/getusermedia/gum"
       title="View source for this page on GitHub" id="viewSource">View source on GitHub</a>
</div>

<script src="https://webrtc.github.io/adapter/adapter-latest.js"></script>
<script src="js/main.js"></script>

<script src="../../../js/lib/ga.js"></script>

</body>
</html>
ここからカメラの動画表示のみ取り出して見ました。
samp01.html
<!DOCTYPE html>
<html>
    <head>
        <meta charset="utf-8">
        <title>getUserMedia</title>
    </head>
    <body>
        <div id="container">
            <h1>WebRTC samples getUserMedia</h1>
            <video autoplay playsinline></video><br>
            <button id="showVideo" onclick="init()">Open camera</button>
        </div>
        <script>
            function init() {
                navigator.mediaDevices.getUserMedia({audio: false, video: true})
                .then(function(stream) {
                    document.querySelector('video').srcObject = stream; })
                .catch(function(err) {
                    console.error(err); } );
            }
        </script>
    </body>
</html>- 10行 videoタグ要素を用いて映像表示箇所を作成。この時必要に応じて、autoplay、 playsinline等を指定
- 11行 Open cameraボタンが押されると関数 “init()”が実行されます。
- 14行 function init()の定義
- 15行 navigator.mediaDevices.getUserMedia({audio: false, video: true})
- この関数が今回のキーです。Webカメラやマイクのメディアストリームを取得する時に使います。
- 引数で取得したいメディアで指定します。{audio: false, video: true}
- メディアの取得が成功すれば .then以降が、失敗すれば .catch以降が実行されます。
- 17行 成功すると、画面とStreamを関連づけ動画を開始。
これだけを見るとWebでの動画の再生が簡単に出来そうです。
(2)Use getUserMedia with canvas
ボタンを押した瞬間の映像を表示する(写真に撮る)コードです。これも簡単にして見ました。
samp02.html
<!DOCTYPE html>
<html>
    <head>
        <meta charset="utf-8">
        <title>getUserMedia to canvas</title>
    </head>

    <body>
        <center>
            <h1>WebRTC samples getUserMedia ⇒ canvas</h1>
            <video playsinline autoplay></video><br>
            <button>Take snapshot</button><br>
            <canvas></canvas>
        </center>

        <script>
            'use strict';

            const video = document.querySelector('video');
            const canvas = document.querySelector('canvas');
            const button = document.querySelector('button');
            const constraints = {
                  audio: false,
                  video: true
            };

            navigator.mediaDevices.getUserMedia(constraints).then(handleSuccess).catch(handleError);

            function handleSuccess(stream) {
                  video.srcObject = stream;
            }

            function handleError(error) {
                  console.log('navigator.MediaDevices.getUserMedia error: ', error.message, error.name);
            }

            button.onclick = function() {
                  canvas.width = video.videoWidth;
                  canvas.height = video.videoHeight;
                  canvas.getContext('2d').drawImage(video, 0, 0, canvas.width, canvas.height);
            };

        </script>
    </body>
</html>- 13行: 写真表示用canvas 要素を追加。
- 27行: navigator.mediaDevices.getUserMedia(constraints).then(handleSuccess).catch(handleError);
- 実行はこの部分(カメラ使用許可)から。
- navigator.mediaDevices.getUserMedia関数の引数、完了、失敗処理の指定の書き方が前回と違います。
- 引数: constraints
- この変数は22行で設定されています。
- audio: false/video: true 音ナシ/映像アリ
- 完了の場合: .then(handleSuccess)
- 29行に規定されています。video要素srcObject属性にstreamを代入。
- Streamが開始される。
- 失敗の場合: catch(handleError)
- 33行で規定されています。エラー表示。
- 引数: constraints
- 37行: button.onclick = function() {
- ボタンを押すとここが実行。
- 縦、横を動画のサイズに合わせてcanvas.getContext(‘2d’).drawImage()関数で写真を表示。
- canvas.getContext(‘2d’).drawImage()の引数は、
- 第1引数:video要素
- 第2,3引数:画像左上の座標
- 第4,5引数:画像の幅と高さ
写真は、navigator.mediaDevices.getUserMedia()でMediaStreameを取得し、canvas要素のgetContext(‘2d’).drawImage()関数を使う事により簡単に表示出来ます。
(3)Use getUserMedia with canvas and CSS filters
これは動画、写真に映像効果(Filter)をかけるサンプル。いつもの通りコード簡略化します。
samp03.html
<!DOCTYPE html>
<html>
    <head>
        <meta charset="utf-8">
        <title>getUserMedia + CSS filters</title>
        <style>
            .none {
                -webkit-filter: none;
                filter: none;
            }

            .blur {
                -webkit-filter: blur(3px);
                filter: blur(3px);
            }

            .grayscale {
                -webkit-filter: grayscale(1);
                filter: grayscale(1);
            }

            .invert {
                -webkit-filter: invert(1);
                filter: invert(1);
            }

            .sepia {
                -webkit-filter: sepia(1);
                filter: sepia(1);
            }

            .opacity {
                -webkit-filter: opacity(40%);
                filter: opacity(40%);
            }

            button#snapshot {
                margin: 0 10px 25px 0;
                width: 110px;
            }

            video {
                object-fit: cover;
            }
        </style>
    </head>
    <body>
        <center>
            <h1>WebRTC samples getUserMedia + CSS filters</h1>
            <video playsinline autoplay></video><br>

            <label for="filter">Filter: </label>
            <select id="filter">
                <option value="none">None</option>
                <option value="blur">Blur</option>
                <option value="grayscale">Grayscale</option>
                <option value="invert">Invert</option>
                <option value="sepia">Sepia</option>
                <option value="opacity">opacity</option>
            </select>

            <button id="snapshot">Take snapshot</button><br>

            <canvas></canvas>
        </center>

        <script>
            'use strict';

            const snapshotButton = document.querySelector('button#snapshot');
            const filterSelect = document.querySelector('select#filter');
            const video = document.querySelector('video');
            const canvas = document.querySelector('canvas');
            const constraints = {
                  audio: false,
                  video: true
            };

            navigator.mediaDevices.getUserMedia(constraints).then(handleSuccess).catch(handleError);

            function handleSuccess(stream) {
                  window.stream = stream; // make stream available to browser console
                  video.srcObject = stream;
            }

            function handleError(error) {
                  console.log('navigator.MediaDevices.getUserMedia error: ', error.message, error.name);
            }

            snapshotButton.onclick = function() {
                  canvas.className = filterSelect.value;
                  canvas.width = video.videoWidth;
                  canvas.height = video.videoHeight;
                  canvas.getContext('2d').drawImage(video, 0, 0, canvas.width, canvas.height);
            };

            filterSelect.onchange = function() {
                  video.className = filterSelect.value;
            };

        </script>
    </body>
</html>- ”Use getUserMedia with canvas”のサンプルにプルダウンメニューがついた様なHP
- Filterをプルダウンメニューから選択し画像と動画にFilterを掛ける。
- 6から45行: CSSの指定。Filterの指定が主です。
- 48から65行: HPの本体。52から60行がプルダウンメニュー
- 97行: プルダウンメニューが変更されるとこの関数が実行する。
- 98行: この部分でFilterを掛けている。video要素のclassName属性にFilterの値(filterSelect.value;)を代入しているのみ
98行の、”video.className = filterSelect.value;”のみでFilter効果が得られる様です。
(4)Use getUserMedia with canvas and CSS filters
画像解像度を指定するサンプルです。今回は、QVGA,VGA,HDの3解像度に変更してコードを簡略化しました。
samp04.html
<html>
    <head>
        <meta charset="utf-8">
        <title>getUserMedia: select resolution</title>
    </head>

    <body>

        <center>
            <h1>getUserMedia: select resolution</h1>
            <p></p>
            <p>Click a button to call <code>getUserMedia()</code> with appropriate resolution.</p>

            <div id="buttons">
                <button id="qvga">QVGA</button>
                <button id="vga">VGA</button>
                <button id="hd">HD</button>
            </div>

            <div id="videoblock">
                <p id="dimensions"></p>
                <video playsinline autoplay></video>
           </div>
        </center>

        <script>
            'use strict';

            const videoblock = document.querySelector('#videoblock');
            const dimensions = document.querySelector('#dimensions');
            const video = document.querySelector('video');
            const vgaButton = document.querySelector('#vga');
            const qvgaButton = document.querySelector('#qvga');
            const hdButton = document.querySelector('#hd');
            const qvgaConstraints = {
                    video: {width: {exact: 320}, height: {exact: 240}}
            };

            const vgaConstraints = {
                    video: {width: {exact: 640}, height: {exact: 480}}
            };

            const hdConstraints = {
                    video: {width: {exact: 1280}, height: {exact: 720}}
            };

            vgaButton.onclick = () => {
                    getMedia(vgaConstraints);
            };

            qvgaButton.onclick = () => {
                    getMedia(qvgaConstraints);
            };

            hdButton.onclick = () => {
                    getMedia(hdConstraints);
            };

            function getMedia(constraints) {
                    videoblock.style.display = 'none';
                    navigator.mediaDevices.getUserMedia(constraints)
                        .then(gotStream)
                        .catch(err => {
                            videoblock.style.display = 'block';
                            dimensions.innerText = 'Video not ready';
                        });
            }

            function gotStream(mediaStream) {
                    video.srcObject = mediaStream;
                    videoblock.style.display = 'block';
            }

            video.onloadedmetadata = () => {
                    displayVideoDimensions('loadedmetadata');
            };

            function displayVideoDimensions(whereSeen) {
                    if (video.videoWidth) {
                        dimensions.innerText = 'Actual video dimensions: ' + video.videoWidth +
                        'x' + video.videoHeight + 'px.';
                    } else {
                        dimensions.innerText = 'Video not ready';
                    }
            }

        </script>
    </body>
</html>
- navigator.mediaDevices.getUserMedia()の引数で映像の解像度の指定が出来る。
- QVGAを指定する場合の引数は、qvgaConstraints = {video: {width: {exact: 320}, height: {exact: 240}}}; の様に高さと幅の情報を持って、navigator.mediaDevices.getUserMedia() を実行すれば良い。
(5)Audio-only getUserMedia() output to local audio element
navigator.mediaDevices.getUserMedia()の引数で、映像をオフに音声をオンにしたバージョンです。引数の定義は、23から25行で行っています。
samp05.html
<!DOCTYPE html>
<html>
    <head>
        <meta charset="utf-8">
        <title>gUM audio</title>
    </head>

    <body>

        <center>
            <h1>WebRTC samples getUserMedia, audio only</h1>
            <audio controls autoplay></audio>
            <div>
                <span id="errorMsg"></span>
            </div>
        </center>

        <script>
            'use strict';

            // Put variables in global scope to make them available to the browser console.
            const audio = document.querySelector('audio');
            const constraints = window.constraints = {
                  audio: true,
                  video: false
            };

            function handleSuccess(stream) {
                  audio.srcObject = stream;
            }

            function handleError(error) {
                  const errorMessage = 'navigator.MediaDevices.getUserMedia error: ' + error.message + ' ' + error.name;
                  document.getElementById('errorMsg').innerText = errorMessage;
                  console.log(errorMessage);
            }

            navigator.mediaDevices.getUserMedia(constraints).then(handleSuccess).catch(handleError);
        </script>

    </body>
</html>
(6)Audio-only getUserMedia() displaying volume
音の大きさをメータに表示するサンプル。navigator.mediaDevices.getUserMedia()で得たStream(今回は音声のみ)の値を140行に有る関数 meterRefresh = setInterval(() でその値とバーレベルを表示している様です。
samp06.html
<!DOCTYPE html>
<html>
    <head>
        <title>Audio stream volume</title>
        <style>
            div#meters > div { margin: 0 0 1em 0; }
            div#meters div.label {
                display: inline-block;
                font-weight: 400;
                margin: 0 0.5em 0 0;
                width: 3.5em;
            }
            div#meters div.value { display: inline-block; }
            meter { width: 50%; }
            meter#clip { color: #db4437; }
            meter#slow { color: #f4b400; }
            meter#instant { color: #0f9d58; }
        </style>
    </head>
    <body>
        <h1>
            <a href="//webrtc.github.io/samples/" title="WebRTC samples homepage">WebRTC samples</a>
            <span>Audio stream volume</span>
        </h1>
        <p>Measure the volume of a local media stream using WebAudio.</p>

        <div id="meters">
            <div id="instant">
                <div class="label">Instant:</div>
                <meter high="0.25" max="1" value="0"></meter>
                <div class="value"></div>
            </div>
            <div id="slow">
                <div class="label">Slow:</div>
                <meter high="0.25" max="1" value="0"></meter>
                <div class="value"></div>
            </div>
            <div id="clip">
                <div class="label">Clip:</div>
                <meter max="1" value="0"></meter>
                <div class="value"></div>
            </div>
        </div>

        <div>
            <button type="button" id="startButton">Start</button>
            <button type="button" id="stopButton" disabled>Stop</button>
        </div>

        <script>
        'use strict';
        // =====================  soundmeter.js  ========================================================
            function SoundMeter(context)
            {
                this.context = context;
                this.instant = 0.0;
                this.slow = 0.0;
                this.clip = 0.0;
                this.script = context.createScriptProcessor(2048, 1, 1);
                const that = this;
                this.script.onaudioprocess = function(event)
                {
                    const input = event.inputBuffer.getChannelData(0);
                    let i;
                    let sum = 0.0;
                    let clipcount = 0;
                    for (i = 0; i < input.length; ++i)
                    {
                        sum += input[i] * input[i];
                        if (Math.abs(input[i]) > 0.99) clipcount += 1;
                    }
                    that.instant = Math.sqrt(sum / input.length);
                    that.slow = 0.95 * that.slow + 0.05 * that.instant;
                    that.clip = clipcount / input.length;
                };
            }

            SoundMeter.prototype.connectToSource = function(stream, callback)
            {
                console.log('SoundMeter connecting');
                try
                {
                    this.mic = this.context.createMediaStreamSource(stream);
                    this.mic.connect(this.script);
                    // necessary to make sample run, but should not be.
                    this.script.connect(this.context.destination);
                    if (typeof callback !== 'undefined') callback(null);
                }
                catch (e)
                {
                    console.error(e);
                    if (typeof callback !== 'undefined') callback(e);
                }
            };

            SoundMeter.prototype.stop = function()
            {
                console.log('SoundMeter stopping');
                this.mic.disconnect();
                this.script.disconnect();
            };

            // =====================  main.js  ========================================================
            const startButton = document.getElementById('startButton');
            const stopButton = document.getElementById('stopButton');
            startButton.onclick = start;
            stopButton.onclick = stop;

            const instantMeter = document.querySelector('#instant meter');
            const slowMeter = document.querySelector('#slow meter');
            const clipMeter = document.querySelector('#clip meter');

            const instantValueDisplay = document.querySelector('#instant .value');
            const slowValueDisplay = document.querySelector('#slow .value');
            const clipValueDisplay = document.querySelector('#clip .value');

            // Put variables in global scope to make them available to the browser console.
            const constraints = window.constraints =
            {
              audio: true,
              video: false
            };

            let meterRefresh = null;

            function handleSuccess(stream)
            {
                // Put variables in global scope to make them available to the
                // browser console.
                window.stream = stream;
                const soundMeter = window.soundMeter = new SoundMeter(window.audioContext);
                soundMeter.connectToSource(stream, function(e)
                {
                    if (e)
                    {
                        alert(e);
                        return;
                    }

                    meterRefresh = setInterval(() =>
                    {
                        instantMeter.value = instantValueDisplay.innerText = soundMeter.instant.toFixed(2);
                        slowMeter.value = slowValueDisplay.innerText = soundMeter.slow.toFixed(2);
                        clipMeter.value = clipValueDisplay.innerText = soundMeter.clip;
                    }, 200);
                });
            }

            function handleError(error)
            {
                console.log('navigator.MediaDevices.getUserMedia error: ', error.message, error.name);
            }

            function start()
            {
                console.log('Requesting local stream');
                startButton.disabled = true;
                stopButton.disabled = false;

                try
                {
                    window.AudioContext = window.AudioContext || window.webkitAudioContext;
                    window.audioContext = new AudioContext();
                }
                catch (e)
                {
                    alert('Web Audio API not supported.');
                }

                navigator.mediaDevices
                  .getUserMedia(constraints)
                  .then(handleSuccess)
                  .catch(handleError);
            }

            function stop()
            {
                console.log('Stopping local stream');
                startButton.disabled = false;
                stopButton.disabled = true;

                window.stream.getTracks().forEach(track => track.stop());
                window.soundMeter.stop();
                window.audioContext.close();
                clearInterval(meterRefresh);
                instantMeter.value = instantValueDisplay.innerText = '';
                slowMeter.value = slowValueDisplay.innerText = '';
                clipMeter.value = clipValueDisplay.innerText = '';
            }

        </script>
    </body>
</html>
(7)Record stream
動画の録画、再生、保存の3つ機能についてのサンプルです。
samp07.html
<!DOCTYPE html>
<html>
    <head>
        <meta charset="utf-8">
        <title>MediaStream Recording</title>
    </head>

    <style>
        video {
              background: #222;
              vertical-align: top;
              --width: 25vw;
              width: var(--width);
              height: calc(var(--width) * 0.5625);
       }
    </style>

    <body>
        <center>

            <h1>WebRTC samples MediaRecorder</h1>
            <video id="gum" playsinline autoplay muted></video>
            <video id="recorded" playsinline loop></video>

            <div>
                <button id="start">Start camera</button>
                <button id="record" disabled>Start Recording</button>
                <button id="play" disabled>Play</button>
                <button id="download" disabled>Download</button>
            </div>

            <div>
                Recording format: <select id="codecPreferences" disabled></select>
            </div>
            <div>
                <h4>Media Stream Constraints options</h4>
                <p>Echo cancellation: <input type="checkbox" id="echoCancellation"></p>
            </div>

            <div>
                <span id="errorMsg"></span>
            </div>

        </center>

        <script>
            'use strict';

            /* globals MediaRecorder */

            let mediaRecorder;
            let recordedBlobs;

            const codecPreferences = document.querySelector('#codecPreferences');

            const errorMsgElement = document.querySelector('span#errorMsg');
            const recordedVideo = document.querySelector('video#recorded');
            const recordButton = document.querySelector('button#record');
            recordButton.addEventListener('click', () => {
                      if (recordButton.textContent === 'Start Recording') {
                        startRecording();
                      } else {
                        stopRecording();
                        recordButton.textContent = 'Start Recording';
                        playButton.disabled = false;
                        downloadButton.disabled = false;
                        codecPreferences.disabled = false;
                      }
            });

            const playButton = document.querySelector('button#play');
            playButton.addEventListener('click', () => {
                      const mimeType = codecPreferences.options[codecPreferences.selectedIndex].value.split(';', 1)[0];
                      const superBuffer = new Blob(recordedBlobs, {type: mimeType});
                      recordedVideo.src = null;
                      recordedVideo.srcObject = null;
                      recordedVideo.src = window.URL.createObjectURL(superBuffer);
                      recordedVideo.controls = true;
                      recordedVideo.play();
            });

            const downloadButton = document.querySelector('button#download');
            downloadButton.addEventListener('click', () => {
                      const blob = new Blob(recordedBlobs, {type: 'video/webm'});
                      const url = window.URL.createObjectURL(blob);
                      const a = document.createElement('a');
                      a.style.display = 'none';
                      a.href = url;
                      a.download = 'test.webm';
                      document.body.appendChild(a);
                      a.click();
                      setTimeout(() => {
                        document.body.removeChild(a);
                        window.URL.revokeObjectURL(url);
                      }, 100);
            });

            function handleDataAvailable(event) {
                      console.log('handleDataAvailable', event);
                      if (event.data && event.data.size > 0) {
                        recordedBlobs.push(event.data);
                      }
            }

            function getSupportedMimeTypes() {
                     const possibleTypes = [
                            'video/webm;codecs=vp9,opus',
                            'video/webm;codecs=vp8,opus',
                            'video/webm;codecs=h264,opus',
                            'video/mp4;codecs=h264,aac',
                    ];
                  return possibleTypes.filter(mimeType => {
                        return MediaRecorder.isTypeSupported(mimeType);
                    });
            }

            function startRecording() {
                      recordedBlobs = [];
                      const mimeType = codecPreferences.options[codecPreferences.selectedIndex].value;
                      const options = {mimeType};

                      try {
                        mediaRecorder = new MediaRecorder(window.stream, options);
                      } catch (e) {
                        console.error('Exception while creating MediaRecorder:', e);
                        errorMsgElement.innerHTML = `Exception while creating MediaRecorder: ${JSON.stringify(e)}`;
                        return;
                        }

                      console.log('Created MediaRecorder', mediaRecorder, 'with options', options);
                      recordButton.textContent = 'Stop Recording';
                      playButton.disabled = true;
                      downloadButton.disabled = true;
                      codecPreferences.disabled = true;
                      mediaRecorder.onstop = (event) => {
                                console.log('Recorder stopped: ', event);
                                console.log('Recorded Blobs: ', recordedBlobs);
                      };
                      mediaRecorder.ondataavailable = handleDataAvailable;
                      mediaRecorder.start();
                      console.log('MediaRecorder started', mediaRecorder);
            }

            function stopRecording() {
                      mediaRecorder.stop();
            }

            function handleSuccess(stream) {
                      recordButton.disabled = false;
                      console.log('getUserMedia() got stream:', stream);
                      window.stream = stream;

                      const gumVideo = document.querySelector('video#gum');
                      gumVideo.srcObject = stream;

                      getSupportedMimeTypes().forEach(mimeType => {
                        const option = document.createElement('option');
                        option.value = mimeType;
                        option.innerText = option.value;
                        codecPreferences.appendChild(option);
                      });
                      codecPreferences.disabled = false;
            }

            async function init(constraints) {
                      try {
                        const stream = await navigator.mediaDevices.getUserMedia(constraints);
                        handleSuccess(stream);
                      } catch (e) {
                        console.error('navigator.getUserMedia error:', e);
                        errorMsgElement.innerHTML = `navigator.getUserMedia error:${e.toString()}`;
                      }
            }

            document.querySelector('button#start').addEventListener('click', async () => {
                      document.querySelector('button#start').disabled = true;
                      const hasEchoCancellation = document.querySelector('#echoCancellation').checked;
                      const constraints = {
                        audio: {
                          echoCancellation: {exact: hasEchoCancellation}
                        },
                        video: {
                          width: 1280, height: 720
                        }
                      };
                      console.log('Using media constraints:', constraints);
                      await init(constraints);
            });
        </script>
    </body>
</html>
HTMLの流れ
- Start camera ボタンを押してStreamingを開始。
- ブラウザでコードを読み込む。
- Start Recording ボタンを押すと録画が開始されます。
- Stop Recording ボタンで録画終了。録画したデータが再生用画面に表示。
- ”Download”ボタンを押すと、録画したデータのダウンロード開始。
- ========= ”Start camera”ボタンが押されと以下が実行される ==========
- 175行: カメラ使用許可の初期設定。
- ”Start camera”の無効化
- ”echoCancellation”チェックボックスのチェックの有無
- navigator.mediaDevices.getUserMedia()の引数の設定
- 上記の操作後、165行の ”init()” へ飛びます
- 165行: カメラ使用許可依頼
- navigator.mediaDevices.getUserMedia()を実行してカメラ使用許可依頼
- OKなら148行、handleSuccess()へ
- Errorならエラー処理を行います。
- 148行: Streamingの開始
- ”Start Recording”ボタンを有効にする。
- 151行: window.stream = stream;
- window要素のstream属性にnavigator.mediaDevices.getUserMedia()からのstreamを代入。
- これは、この後でStreamingを録画する時に使用します。
- 156から161行: 対応するフォーマットの確認
- 対応フォーマットが、プルダウンメニュー、”Recording format”に追加されます。
- プルダウンメニュー、”Recording format”を有効にする。
- ========= ”Start Recording”ボタンが押されと以下が実行される ==========
- 59行: ”record”ボタンクリックイベントの追加
- ボタンが、’Start Recording’ならstartRecording(); 117行を実行
- それ以外は、stopRecording();を実行
- 117行: startRecording() 録画開始
- 118行: 録画用配列の宣言
- 120行: 画像タイプの取得
- 123行: MediaRecorder()の定義。引数は、window.streamとフォーマット
- 135行: ストップイベント処理の登録
- 139行: 画像データレディーイベントの登録。イベントで、handleDataAvailable()が実行
- 140行: 録画の開始
- 98行: handleDataAvailable()
- 100行: データの有無を確認して
- 101行: データが有れば、録画用配列(recordedBlobs)に書き込む。
- 144行: stopRecording() 録画終了。
- この時、135行のストップイベント(コンソールに表示)が実行される。
- ========= ”Play”ボタンが押されと以下が実行される ==========
- 72行: ”play”ボタンクリックイベントの追加
- 73行: データのタイプ取得
- 74行: 録画したデータとタイプで新しい配列を宣言
- 77行: 録画表示用の画面(recordedVideo)要素のsrc属性に配列データを代入
- 78行: ビデオコントロールをオンに設定
- 79行: 再生開始
- 23行: videoタグで、”loop”と定義されているので再生は繰り返される。
- ========= ”download”ボタンが押されと以下が実行される ==========
- 83行: ”download”ボタンクリックイベントの追加
- 84行: 録画データとデータタイプを合わせてダウンロード用配列を定義
- 85行: 配列のURLを取得
- 86行: ”a”タグ要素の製作
- 90行: 要素をbodyに追加
- 91行: ダウンロードの開始
- 92から95行: ダウンロード後、100ミリセックで下記を行う
- ダウンロード要素の削除
- ダウンロード用配列の削除
次回は
今回はカメラの使い方、画像の再生、録画用のコードの説明でした。”WebRTC samples”にはこれ以外に下記の項目についてコードの説明が有ります。今後これらにつても見て行く予定です。
- Devices:
- Stream capture:
- RTCPeerConnection:
- RTCDataChannel:
- Video chat:
- Insertable Streams: