前回Firebaseを使用してRouter越しP2P接続が出来る事が分かったので、今回は部品を集めて監視カメラを作って見ます。
監視カメラの製作(ハード)
使用した主な部品一覧
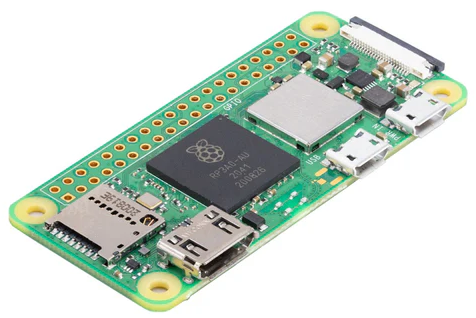 | Raspberry Pi Zero 2 W 今回は Zero 2Wを使用します。 |
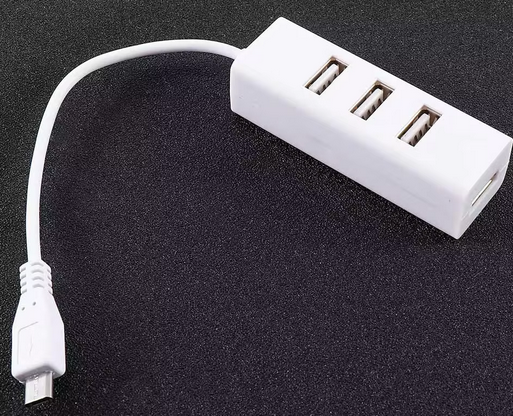 | 多機能USBケーブルアダプター Zero 2WはUSBポートが少ないのでこれでポートを増やしています。 |
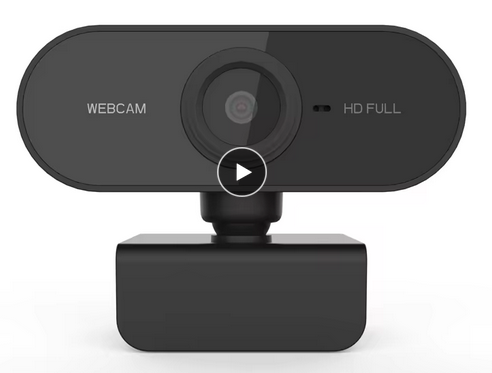 | ミニコンピューターWebカメラ 安価なUSBカメラ |
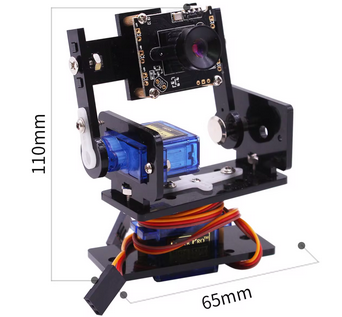 | 2dofサーボ サーボモータを持った2軸のARM。 USBカメラをこれに取り付けてカメラの向きを制御します。 |
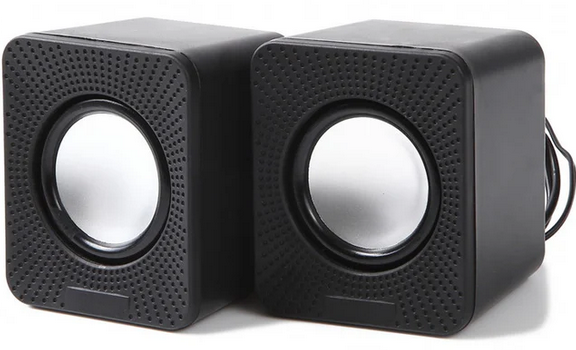 | ミニスピーカー ダイソーの300円スピーカ。電源はUSB。音入力は3.5mm ステレオミニプラグ |
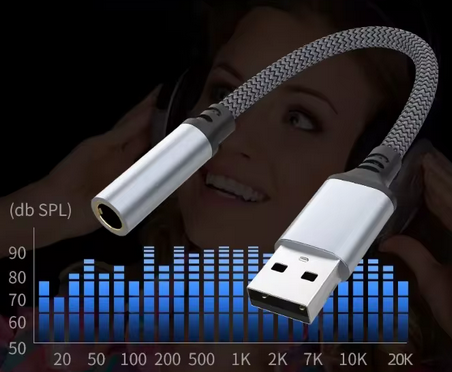 | ラップトップ用の外部サウンドカード スピーカーの音入力をUSBに変換する為に使用 |
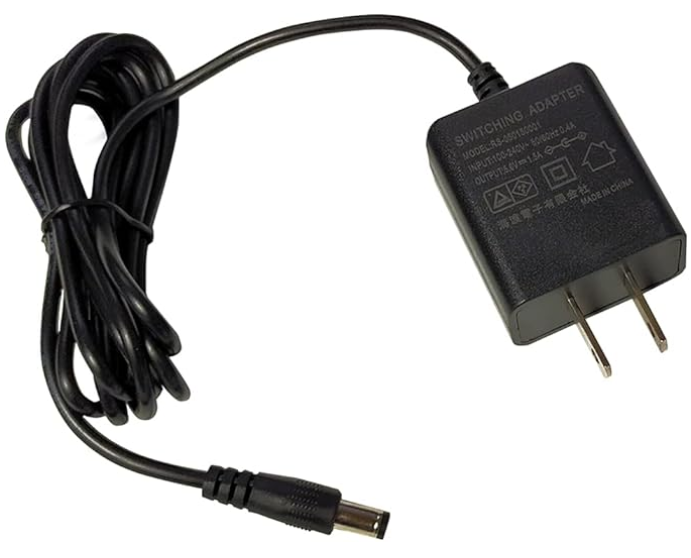 | ACアダプター 5V 1.5A 7.5W 電源 |
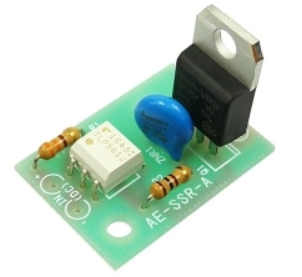 | ソリッド・ステート・リレー AC100Vのオンオフに使用。現在LEDをオンオフしているポートでこのSSRを制御 |
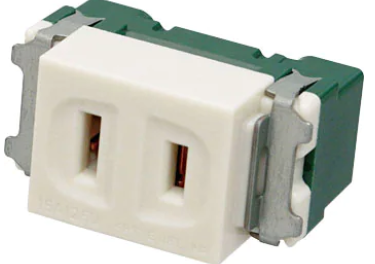 | 埋め込みコンセント SSRの出力先。このコンセントにAC100Vのライトを接続。 周りが暗い時にライトを点灯させる。 |
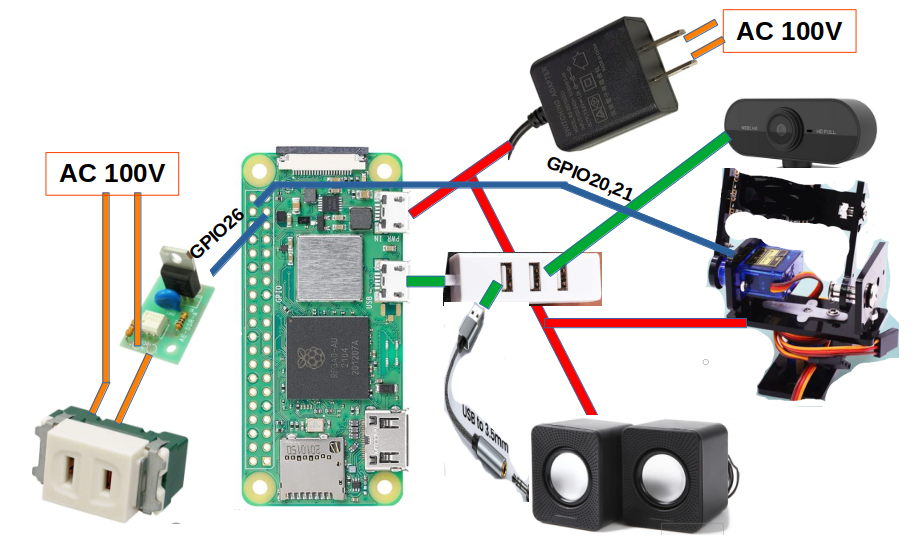
監視カメラの構成
Raspberry PI Zero 2Wを中心に各部品を下記の様に配線しています。
実際の監視カメラ
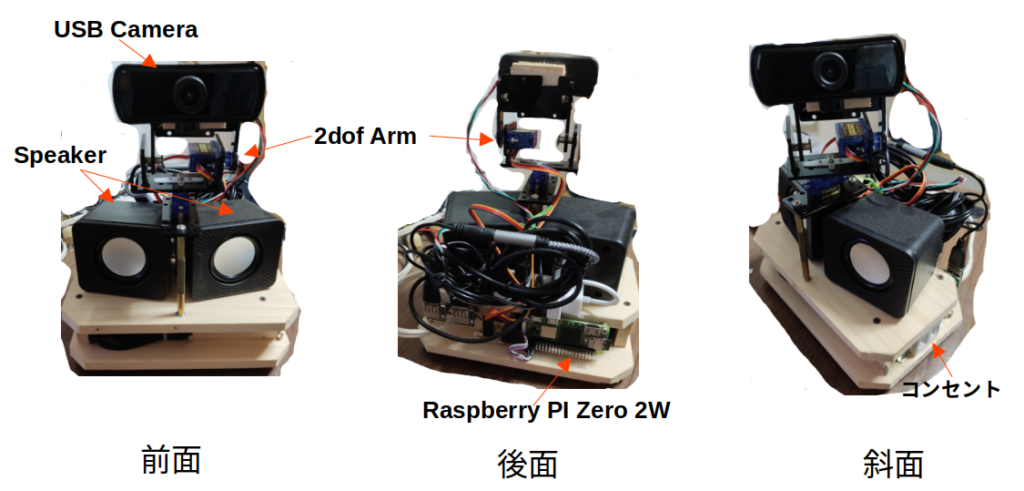
- 土台(2枚の板で挟まれた)部分に電源とSSR、コンセントを配置
- 土台の上にスピーカを設置。
- スピーカの上に2軸のArmとカメラを配置。
- Zero 2Wは土台後面に取り付けています。
監視カメラの製作(ソフト)
Raspberry PI側の設定
今回はRaspberry PI Zero 2W(今まではRaspberry PI 3B+)を使用しているので簡単にRaspberry PI imageのインストールから説明します。
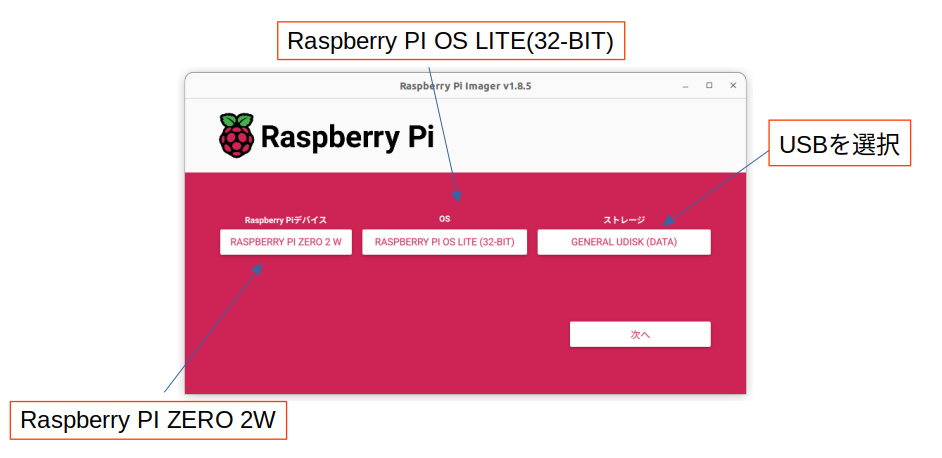
- Raspberry PIデバイス ー> Raspberry PI ZERO 2W
- OS ー> Raspberry PI OS LITE(32-BIT)
- ストレージ ー> USBを選択
”次へ” のボタンを押して

この画面で”設定を編集する”をクリック。一般タブで
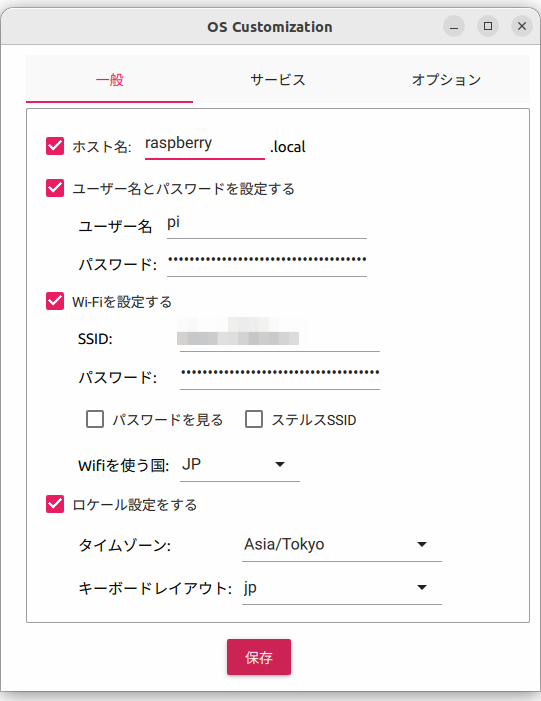
- ホスト名: raspberry
- ユーザー名とパスワード
- ユーザー名: pi
- パスワード: 各自設定して下さい。
- Wi-Fiを設定する: 各自設定して下さい。
- ロケールを設定する
- タイムゾーン: Asia/Tokyo
- キーボード: jp
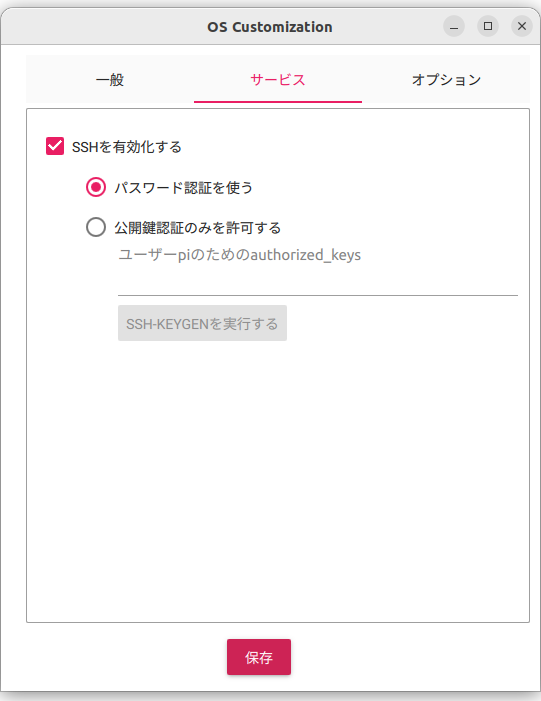
サービスタブでSSHを有効にします。
設定後、”保存”をクリックすると下記が表示されます。ここで”はい”をクリックしてImageの書き込み開始。

書き込み終了後、以下をセットアップして下さい。
- UV4L関係
- FireBase関係
最後に中継サーバ”uv4l-sig.py”を保存します。Raspberry PI Zero 2Wのホームディレクトリの下に”uv4l”ディレクトリを作成しそこに保存します。
uv4l-sig.py
#!/usr/bin/env python3
import websocket
import json
import threading
import time
import firebase_admin
from firebase_admin import credentials
from firebase_admin import firestore
from gpiozero import AngularServo
from gpiozero.pins.pigpio import PiGPIOFactory
from gpiozero import LED
import subprocess

def ready():
    servo_rl.angle = 30
    time.sleep(1)
    servo_ud.angle = -30
    time.sleep(1)
    go_home()

def go_home():
    db.collection("uv4l-cam").document("state").set({"light": 0, "m1": 0, "m2": 1, "signal": "none", "r": 0, "u": 0, "motor": 0x0f})
    servo_rl.angle = 0
    time.sleep(2)
    servo_ud.angle = 0

# Set Up SG90
factory = PiGPIOFactory()
servo_ud = AngularServo(21, min_angle = -90, max_angle = 90, min_pulse_width = 0.0005, max_pulse_width = 0.0024, frame_width = 0.02, pin_factory = factory)
servo_rl = AngularServo(20, min_angle = -90, max_angle = 90, min_pulse_width = 0.0005, max_pulse_width = 0.0024, frame_width = 0.02, pin_factory = factory)

# Set Up SSR
ssr = LED(26)
ssr.off()

# Setup Firebase
cred = credentials.Certificate('xxxxxxxxxxxxxxxxxxxxx.json')
firebase_admin.initialize_app(cred)
db = firestore.client()

db.collection("uv4l-cam").document("client").set({"what": "none"})
db.collection("uv4l-cam").document("raspi").set({"what": "none", "data": "none"})


# Start server
ready()

flg_open = 0

# Create an Event for notifying main thread.
callback_done = threading.Event()
# Create a callback on_snapshot function to capture changes
def on_snapshot(doc_snapshot, changes, read_time):
    global flg_open, ws

    doc = doc_snapshot[0]
    print('client: ', json.dumps(doc.to_dict()))
    cmd = doc.to_dict()["what"]

    if cmd != 'none':
        if cmd == 'open':
            flg_open = 1

        elif cmd == 'close':
            if flg_open == 1:
                ws.close()

        elif cmd == 'locate':
            if  doc.to_dict()["no"] == "u":
                servo_ud.angle =  doc.to_dict()["u"]
            elif doc.to_dict()["no"] == "r":
                servo_rl.angle =  doc.to_dict()["r"]
            else:
                servo_ud.angle =  0
                time.sleep(0.5)
                servo_rl.angle =  0
            db.collection("uv4l-cam").document("raspi").set({"what": "locate", "data": doc.to_dict()["motor"], "u": doc.to_dict()["u"], "r": doc.to_dict()["r"]})
            time.sleep(0.5)

        elif cmd == 'light':
            if doc.to_dict()["data"] == 1:
                ssr.on()
            else:
                ssr.off()
            db.collection("uv4l-cam").document("raspi").set({"what": "light", "data": doc.to_dict()["data"]})

        elif cmd == 'mute':
            if doc.to_dict()["data"] == 1:
                cmd = "amixer set Mic nocap -c 2"
            else:
                cmd = "amixer set Mic cap -c 2"
            subprocess.run(cmd.split())

        elif cmd == 'reboot':
            cmd = "sudo reboot"
            subprocess.run(cmd.split())

        else:
            if flg_open == 1:
                ws.send(json.dumps(doc.to_dict()))

    callback_done.set()

doc_ref = db.collection("uv4l-cam").document("client")
# Watch the document
doc_watch = doc_ref.on_snapshot(on_snapshot)

def on_message(ws, message):
    global db

    print(message)
    db.collection("uv4l-cam").document("raspi").set(json.loads(message))

def on_error(ws, error):
    print(error)

def on_close(ws, close_status_code, close_msg):
    global flg_open, db

    print("### closed ###")
    flg_open = 0
    db.collection("uv4l-cam").document("state").update({"signal": "none"})

def on_open(ws):
    global db

    print("Opened connection")
    db.collection("uv4l-cam").document("state").update({"signal": "connect"})

a = 1
while a == 1:
    if flg_open == 1:
        ws = websocket.WebSocketApp("ws://raspberry.local:8090/stream/webrtc",
                          on_open=on_open,
                          on_message=on_message,
                          on_error=on_error,
                          on_close=on_close)

        ws.run_forever()
このソフトは以下の操作を行います。
- UV4LのSig_Serverへの中継 (133行でSig_ServerにWebsocketでクライアントとして接続しています)
- 2軸サーボアームの制御。外部ライトの制御(AC100Vのオンオフ)
プログララム37行 cred = credentials.Certificate(‘xxxxxxxxxxxxxxxxxxxxx.json’) は、認証ファイル ”xxxxxxxxxxxxxxxxxxxxx.json”の読み込みです。認証ファイルは今回Firebaseの設定を変更するので全ての設定が終了時点で新たに取り直しこのディレクトリに保存して下さい。
このアプリを自動起動させる為に、/etc/systemd/system/に以下のサービスファイル”uv4l.service”を作成。
uv4l.service
[Unit]
Description=UV4L-CAM
After=multi-user.target

[Service]
ExecStart=/usr/bin/python3  uv4l-sig.py
WorkingDirectory=/home/pi/uv4l/
Restart=always
User=pi

[Install]
WantedBy=multi-user.target
保存後、sudo systemctl enable uv4l.service を実行して自動起動を有効にします。
Firebase側の設定
Firebaseでは以下の設定を行っています。
- Authenticationの設定
- メールアドレスで承認されたClientのみHPにアクセス出来様にします。
- HPアクセス時にLogin画面で登録されたメールアドレスとパスワードを入力してLoginします。
- 設定については、このリンクを参照下さい。
- Firestoreの設定
- アクセス権限を承認されたClientのみとする設定します。
- Firestoreアクセス権限設定の画面(下記)で
allow read, write: if true; を allow read, write: if request.auth != null;
に変更すれば承認者のみがアクセス可能となります。 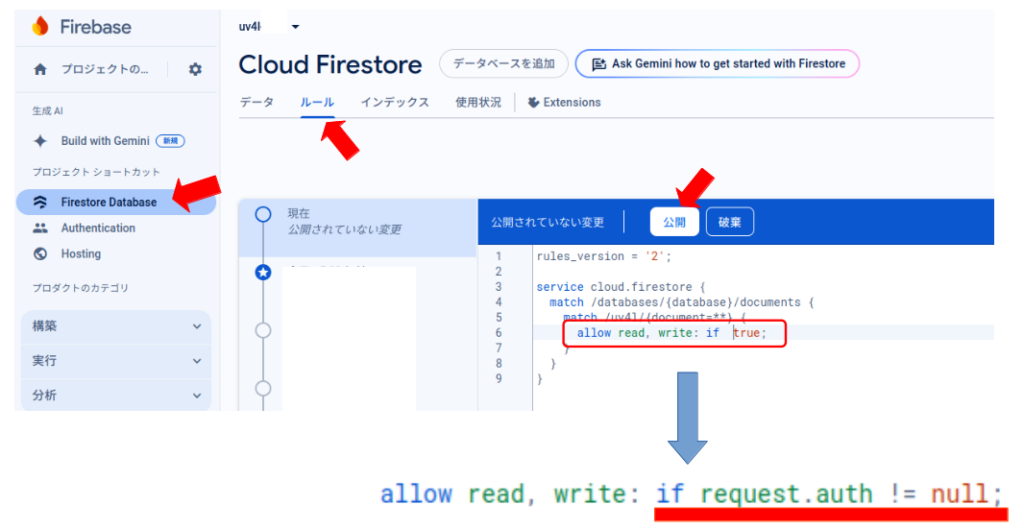
Firebaseコンソールでの設定はここまでです。認証ファイルを取り直します。認証ファイルの取得についてはここを参照下さい。
Firebase作業用PCでのHTMLの準備
今回用意するファイルは下記の4つです。
- index.html Login用HTML
- uv4l.html Streaming用HTML
- intercom.css CSSファイル
- intercom_02.js uv4lで使用するJS
Firebase作業用ディレクトリとしてホームの下に “firebase/uv4l” フォルダーを作成しています。上記4ファイルは”uv4l”フォルダーの下の”public”フォルダーに保存します。
directory
〜/firebase/
           -- uv4l/
                  -- firebase.json
                  -- firestore.indexes.json
                  -- firestore.rules
                  -- public/
                           -- index.html
                           -- intercom.css
                           -- intercon_02.js
                           -- uv4l.html
index.html
index.html
<!DOCTYPE html>
<html>
  <head>
    <meta charset="utf-8">
    <script src="/__/firebase/10.9.0/firebase-app-compat.js"></script>
    <script src="/__/firebase/10.9.0/firebase-auth-compat.js"></script>
    <script src="/__/firebase/init.js?useEmulator=true"></script>

    <script src="https://www.gstatic.com/firebasejs/ui/6.1.0/firebase-ui-auth.js"></script>
    <link type="text/css" rel="stylesheet" href="https://www.gstatic.com/firebasejs/ui/6.1.0/firebase-ui-auth.css" />

  </head>
  <body>
    <div id="firebaseui-auth-container"></div>
    <script type="text/javascript">

      // Initialize Firebase Authentication and get a reference to the service
      const auth = firebase.auth();

      // Initialize Firebase Authentication and get a reference to the service
      var ui = new firebaseui.auth.AuthUI(firebase.auth());

      var uiConfig = {
          callbacks: {
            signInSuccessWithAuthResult: function(authResult, redirectUrl) {
              return true;
            },
          },
          signInFlow: 'popup',
          signInSuccessUrl: './uv4l.html',
          signInOptions: [
            {
              provider: firebase.auth.EmailAuthProvider.PROVIDER_ID,
              requireDisplayName: false
            }
          ],
          tosUrl: '/kiyaku.html',           // 規約とかを描いたページ
          privacyPolicyUrl: '/policy.html'  // プライバシーポリシーを描いたページ
          };

      ui.start('#firebaseui-auth-container', uiConfig);

    </script>
  </body>
</html>
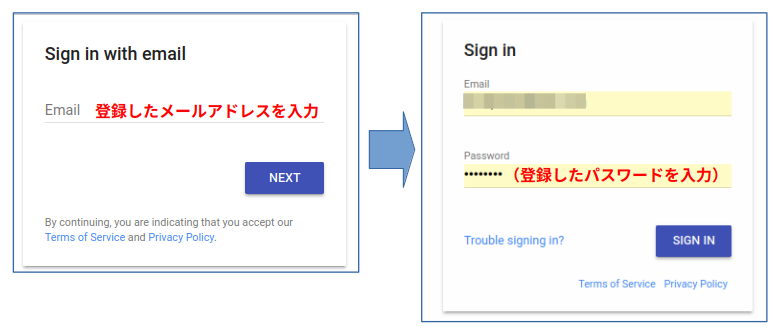
- Login用のHTMLです。
- アクセス ー> メールの入力 ー> NEXT ー> パスワードの入力 ー> SIGN INで Login出来ます。
- 30行:signInSuccessUrl: ‘./uv4l.html’,
- signInSuccessUrl:の後にLoginした後に実行するHTMLを指定します。
- 今回は uv4l.html が実行されます
uv4l.html
Streaming管理用のHTMLです。アクセスすると下記が表示されます。
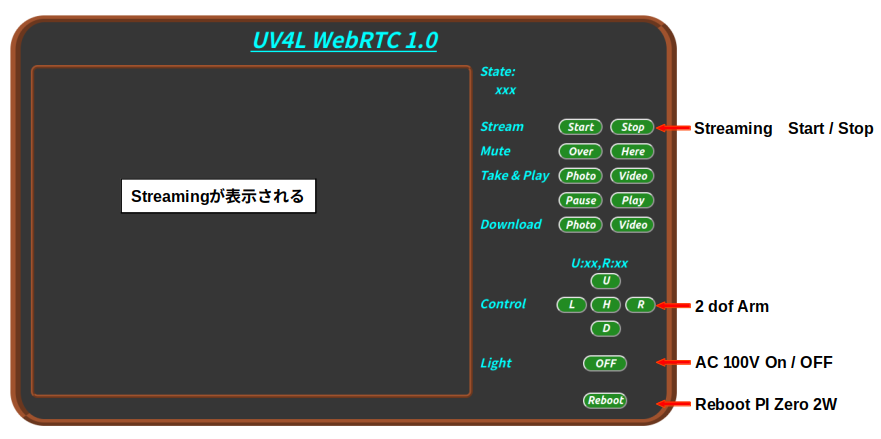
- StreamingのStart/Stop
- カメラのついた2軸アーム
- AC100Vのオンオフ
- Raspberry PI Zero 2WのReboot
- 実際の使用で、Zero 2Wがハングアップする事が度々有りました。
- その時にこのボタンを押して2WをRebootする。
プログラムの起動
プログラムの起動順は以下の通り。
- Firebasedeでの deploy
- 作業用ディレクトリで firebase deploy を実行
- 実行の最後にHPのアドレスが表示される。今回は ”Hosting URL: https://uv4l.web.app”
- raspberry pi zero 2W の起動
- HPにアクセスする前にraspberry PIを起動する必要が有る。
- pi zero 2Wは起動後、中継サーバが自動起動する設定になっています。
- 中継サーバは準備完了後2軸アームをホームポジションに移動します。
- PCまたはスマホからのHPへのアクセス
- 中継サーバは準備完了を確認してからブラウザでHPにアクセス。
- 今回はHPのURLは、”https://uv4l.web.app” ー> ”uv4l.html”が表示されます。
- HP内 Startボタンを押すとStreamingが開始します。
- その他
- プログラムがハングした時
- HPの Reboot ボタンを押してZero 2WをRebootします。上記 ”2”が実行されます。
- 外出中等、zero 2Wが見れない時は中継サーバは準備完了のアームの動作を確認出来ません
動作が完了すると思われる大体の時間待つ事になります。 - 完了を待った後、PCまたはスマホからアクセスし直します。
- HP公開の中止
- 作業用ディレクトリで、”firebase hosting:disable” を実行。
- プログラムがハングした時
最後に
Firebaseを使用すれば、外出先から自宅の監視カメラを(Routerを越えて)制御出来る事が分かりました。ただ、Routerを越える為に必要は処置が多すぎる(Routerを越えがちょっと複雑)様にも思えます。