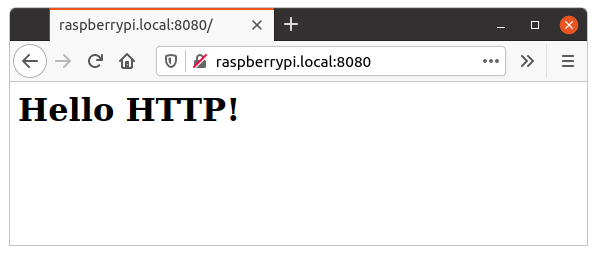
今回は、”index.html”ファイルをクライアントに送ります。前回はself.wfile.write(“<h1>Hello HTTP!
</h1>\n”.encode()) でデータをクライアントに送っています。今回はこの部分を変更します。
先ずはPythonスクリプト
hello_02.py
from http.server import HTTPServer, SimpleHTTPRequestHandler

class MyHandler(SimpleHTTPRequestHandler):

    def do_GET(self):
        self.send_response(200)
        self.send_header('Content-type', "text/html")
        self.end_headers()

        f = open("index.html",'rb')
        self.wfile.write(f.read())
        f.close()

host = ''
port = 8080
httpd = HTTPServer((host, port), MyHandler)
print('serving at port', port)
httpd.serve_forever()
10から12行が変更箇所。これで”index.html”をクライアントに送信出来ます。
- open(file_name,mode)
- file_name: パスを伴ったオープンするファイルのファイル名
- mode: ファイルのモード
文字 意味 r 読み込み用 (デフォルト) w 書き込み用。同名のファイルが有る場合上書きされる。 x 新規ファイルの書き込み用に開くが既に同名のファイルが有る場合、エラーを返す a 書き込み用。ファイルが存在する場合は末尾に追記。 b バイナリモード t テキストモード - 今回、’rb’モードを指定しているのは、wfile.write()関数がバイナリデータを送信するため。
- read(): オープンされたファイルからデータを読み出す。
- close(): ファイルのクローズ。
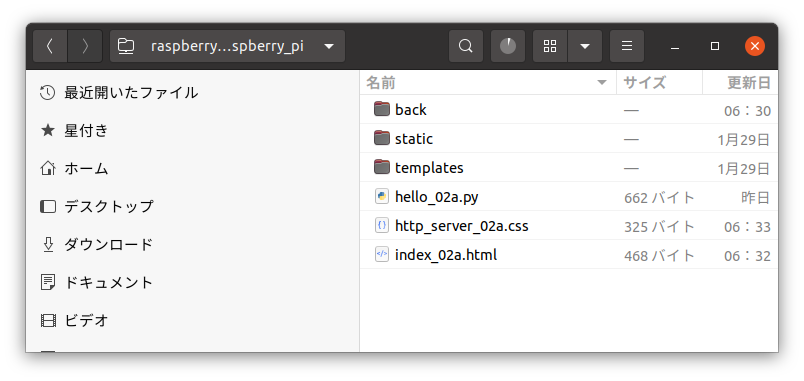
“index.html”の準備
送信する”index.html”は以下の通り。
index.html
<!doctype html>
<html>
    <head>
        <meta charset="utf-8">
        <meta name="viewport" content="width=device-width,initial-scale=1">
        <title>http-server 1.0</title>
    </head>
    <body>
        <center>
            <div class="b_frame">
   	            <h1>Hello HTTP!</div>
            </div>
        </center>
    </body>
</html>
各ファイルの保存場所と実行
Python HTTP-serverは、pythonスクリプトが実行されているフォルダがルートディレクトリになります。 HTMLのコードは”index.html”をルートディレクトリから読み込んでいます。よって”hello_02.py”と”index.html”を同じフォルダに保存してその場所からターミナルで python3 hello_02.py と実行してサーバを起動して下さい。実行後PCのブラウザに、raspberrypi.local:8080といれれば、前回と同じ画面が表示されます。
これだけではつまらないので
これだけではつまらないので、CSSファイルを追加して見ました。HPの書式を定義するファイルです。先ずはCSSファイルの作成。ファイルネームを、”http_server_02a.css”とします。
http_server_02a.css
@charset "UTF-8";

.t_font {
        font-size: 64px;
        font-weight:bold;
        font-style: italic;
        color: #ff0000;
}

.b_frame {
        width: 600px;
        background: #363636;
        padding: 15px;
        border-radius: 10px;
        margin-top: -30px;
        margin-right: 10px;
}
次にindexファイル。新しいindexファイルを、”index_02a.html”とします。
index_02a.html
<!doctype html>
<html>
    <head>
        <meta charset="utf-8">
        <meta name="viewport" content="width=device-width,initial-scale=1">
        <link rel="stylesheet" type="text/css" href="./http_server_02a.css" >
        <title>http-server 1.0</title>
    </head>
    <body>
        <center>
            <div class="b_frame">
   	            <div class="t_font">HTTP-Server 1.0</div>
            </div>
        </center>
    </body>
</html>- 6行目でCSSファイルを定義
- 10行目で全体を中心に配置
- 11行目で表示枠を定義。ここで、CSSのb_frameを使用
- 12行目で文字を表示。ここで、CSSのt_fontを使用。
最後にPythonファイル。ファイル名は、”hello_02a.py”とします。
hello_02a.py
from http.server import HTTPServer, SimpleHTTPRequestHandler

class MyHandler(SimpleHTTPRequestHandler):

    def do_GET(self):

        if self.path == "/":
            self.path = "index_02a.html"
            dataType = "text/html"
        if self.path.endswith(".css"):
            self.path = "." + self.path
            dataType = "text/css"

        f = open(self.path,'rb')
        self.send_response(200)
        self.send_header('Content-type', dataType)
        self.end_headers()
        self.wfile.write(f.read())
        f.close()

host = ''
port = 8080
httpd = HTTPServer((host, port), MyHandler)
print('serving at port', port)
httpd.serve_forever()
- 7行目 ”index_02a.html”の判別
- 10行目 ”http_server_02a.css”の判別
- 14から19行 データの送信
です。これらのファイルを同じフォルダーに保存。
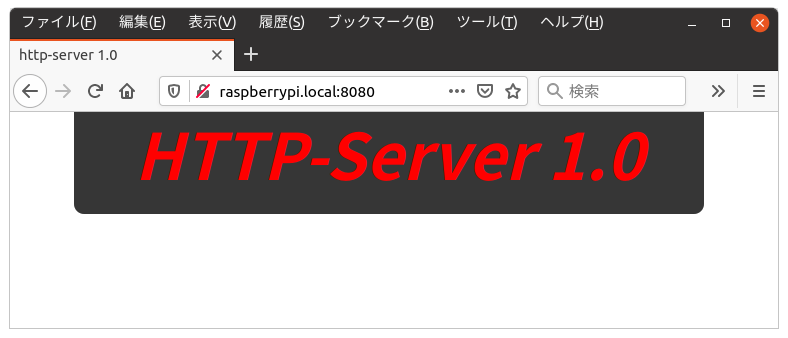
そのフォルダーからターミナルで$ python3 hello_02a.py と実行して下さい。その後Webブラウザで、”raspberrypi.local:8080″にアクセスすればこんな画面が出ます。
流れの説明。
- クライアント: サーバに”GETリクエスト”を送信。
- サーバ : def do_GET(self):でリクエストの処理
- ポインタ、selfを元にクエリの内容を解読。
- クエリが
- ”/” : ”index_02a.html”を送信。
- 最後の4文字が”.css”: ”/http_server_02a.css”を送信
こんな感じです。次回はこのサーバにボタンを追加してみたいと思います。