普段はhttp Severで十分なんんですが、時としてhttps serverが必要になる事が有ります。今回はRaspberry PIでhttps serverを上げて見ます。
httpsでは通信を暗号化する為に証明書が必要になります。幾つか証明書を作成するソフトが有るのですが今回はmkcertを使う事にしました。まずはmkcertのInstallから
mkcertのInstallと証明書作成
Installの手順は以下の通り。
$ sudo apt update

//libnss3-tools のインストール
$ sudo apt install libnss3-tools

//ARM版のバイナリをダウンロード
$ wget -O mkcert https://github.com/FiloSottile/mkcert/releases/download/v1.4.1/mkcert-v1.4.1-linux-arm

//実行権を与えて
$ chmod +x mkcert

//Pathの有るDirectryへ
$ sudo mv mkcert /usr/local/bin/
これでInstall完了です。
次にmkcertを使ってローカルCA(認証局)をシステムにインストールします。
$ mkcert -install
Created a new local CA at "~/.local/share/mkcert" 💥
The local CA is now installed in the system trust store! ⚡️
localhost に対して証明書と秘密鍵を生成するには mkcert localhost を実行します。
$ mkcert localhost
Using the local CA at "/home/kita/.local/share/mkcert" ✨

Created a new certificate valid for the following names 📜
 - "localhost"

The certificate is at "./localhost.pem" and the key at "./localhost-key.pem" ✅
これで localhost-key.pem と localhost.pemの2つのファイルが作成されます。
Pythonでhttps server
https server用に下記のコードを用意しました。サーバにアクセスすると”Hello https server”と表示するコードです。
https_test.py
from http.server import HTTPServer, SimpleHTTPRequestHandler
import ssl

class MyHandler(SimpleHTTPRequestHandler):

    def do_GET(self):
        self.send_response(200)
        self.send_header('Content-type', 'text/html; charset=utf-8')
        self.end_headers()
        self.wfile.write('<h1>Hello https server</h1>'.encode())

# SSLを設定
host = ''
port = 443

httpd = HTTPServer((host, port), MyHandler)

context = ssl.SSLContext(ssl.PROTOCOL_TLS_SERVER)
context.load_cert_chain(certfile='./localhost.pem', keyfile='./localhost-key.pem')
httpd.socket = context.wrap_socket(httpd.socket, server_side=True)

# 起動
print("HTTPS Server running on https://x.x.x.x:443")
httpd.serve_forever()
- 1,2行で必要はLibraryをインポートします。
- 18,19,20行がSSL対応箇所です。
- 18行: SSL用のインスタンスを宣言
- 19行: 証明書を指定
- 20行: httpd.socketを作成。
14行でポートを443と指定しています。httpsでは通常このポートを使用するようです。
ブラウザで確認
上記のPythonのコードをまず実行。画面に以下の様に表示されます。
~ $ sudo python3 https_test.py
HTTPS Server running on https://x.x.x.x:443
ブラウザ(Chrome)のURLにサーバのURLを入力します。ホストネーム”rasp”を使った場合。

IPアドレス “192.168.1.8”を使った場合
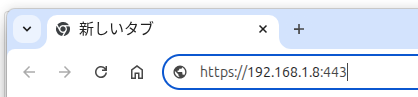
httpsの場合ポートの指定を省くと443となる様です。
”Hello https server”と表示されると思いきや画面が以下のようになりました。
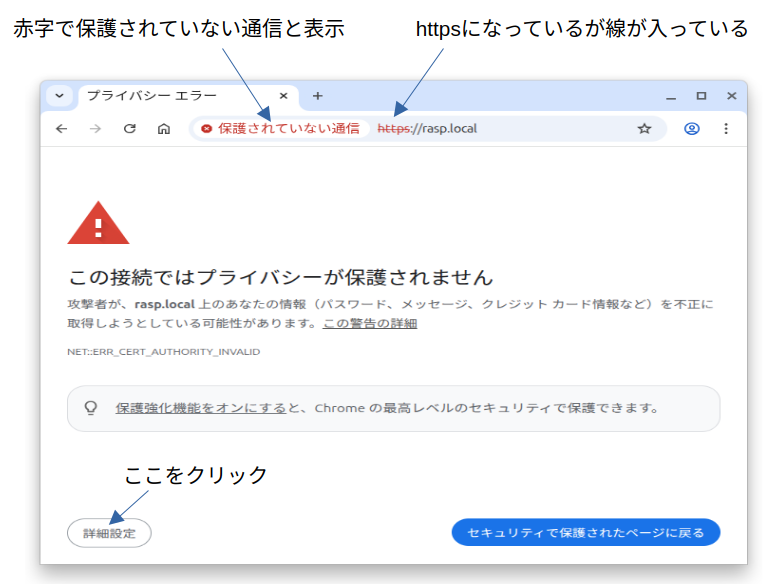
見たことの無い画面ですが、とにかく左下の詳細設定をクリックして下さい。今度はこのような画面が表示されます。
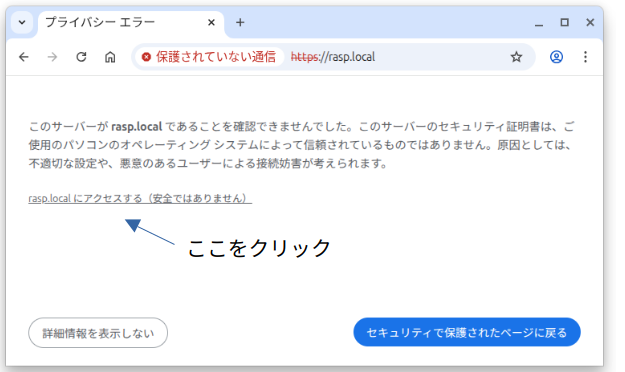
ここで ”rasp.localにアクセスする(安全ではありません)” をクリックして下さい。

やっと期待の画面が表示されました。
httpsで動いているようですが、”保護されていない通信” と https に横線が入ります。ブラウザがmkcertで作った証明書を正式なものと判断していない様です。ただ、Localで開発アプリの動作を確認する等であればこれで問題無いと思います。